Looker Studio
Looker Studio может подключаться к ClickHouse через интерфейс MySQL, используя официальный источник данных Google для MySQL.
Настройка ClickHouse Cloud
Select Connect your app
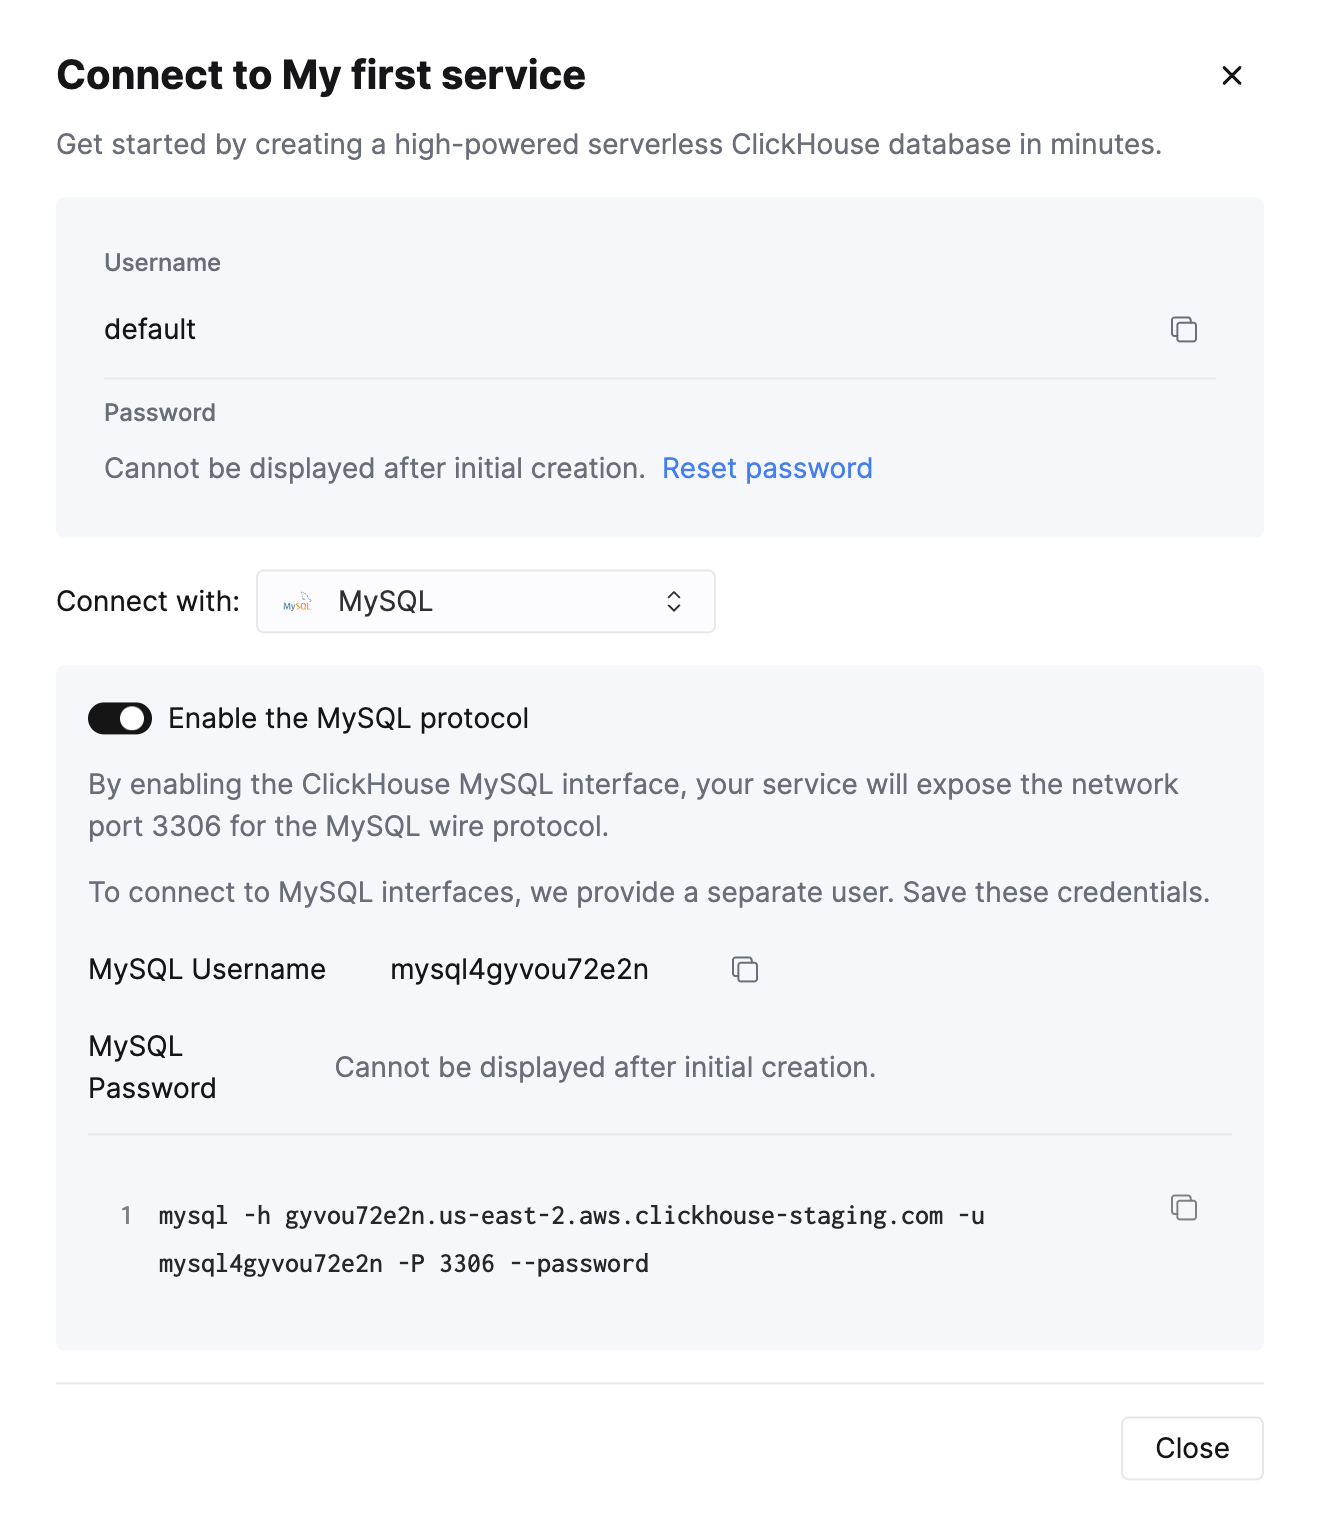
After creating your ClickHouse Cloud Service, on the Connect your app screen, select MySQL from the drop down.
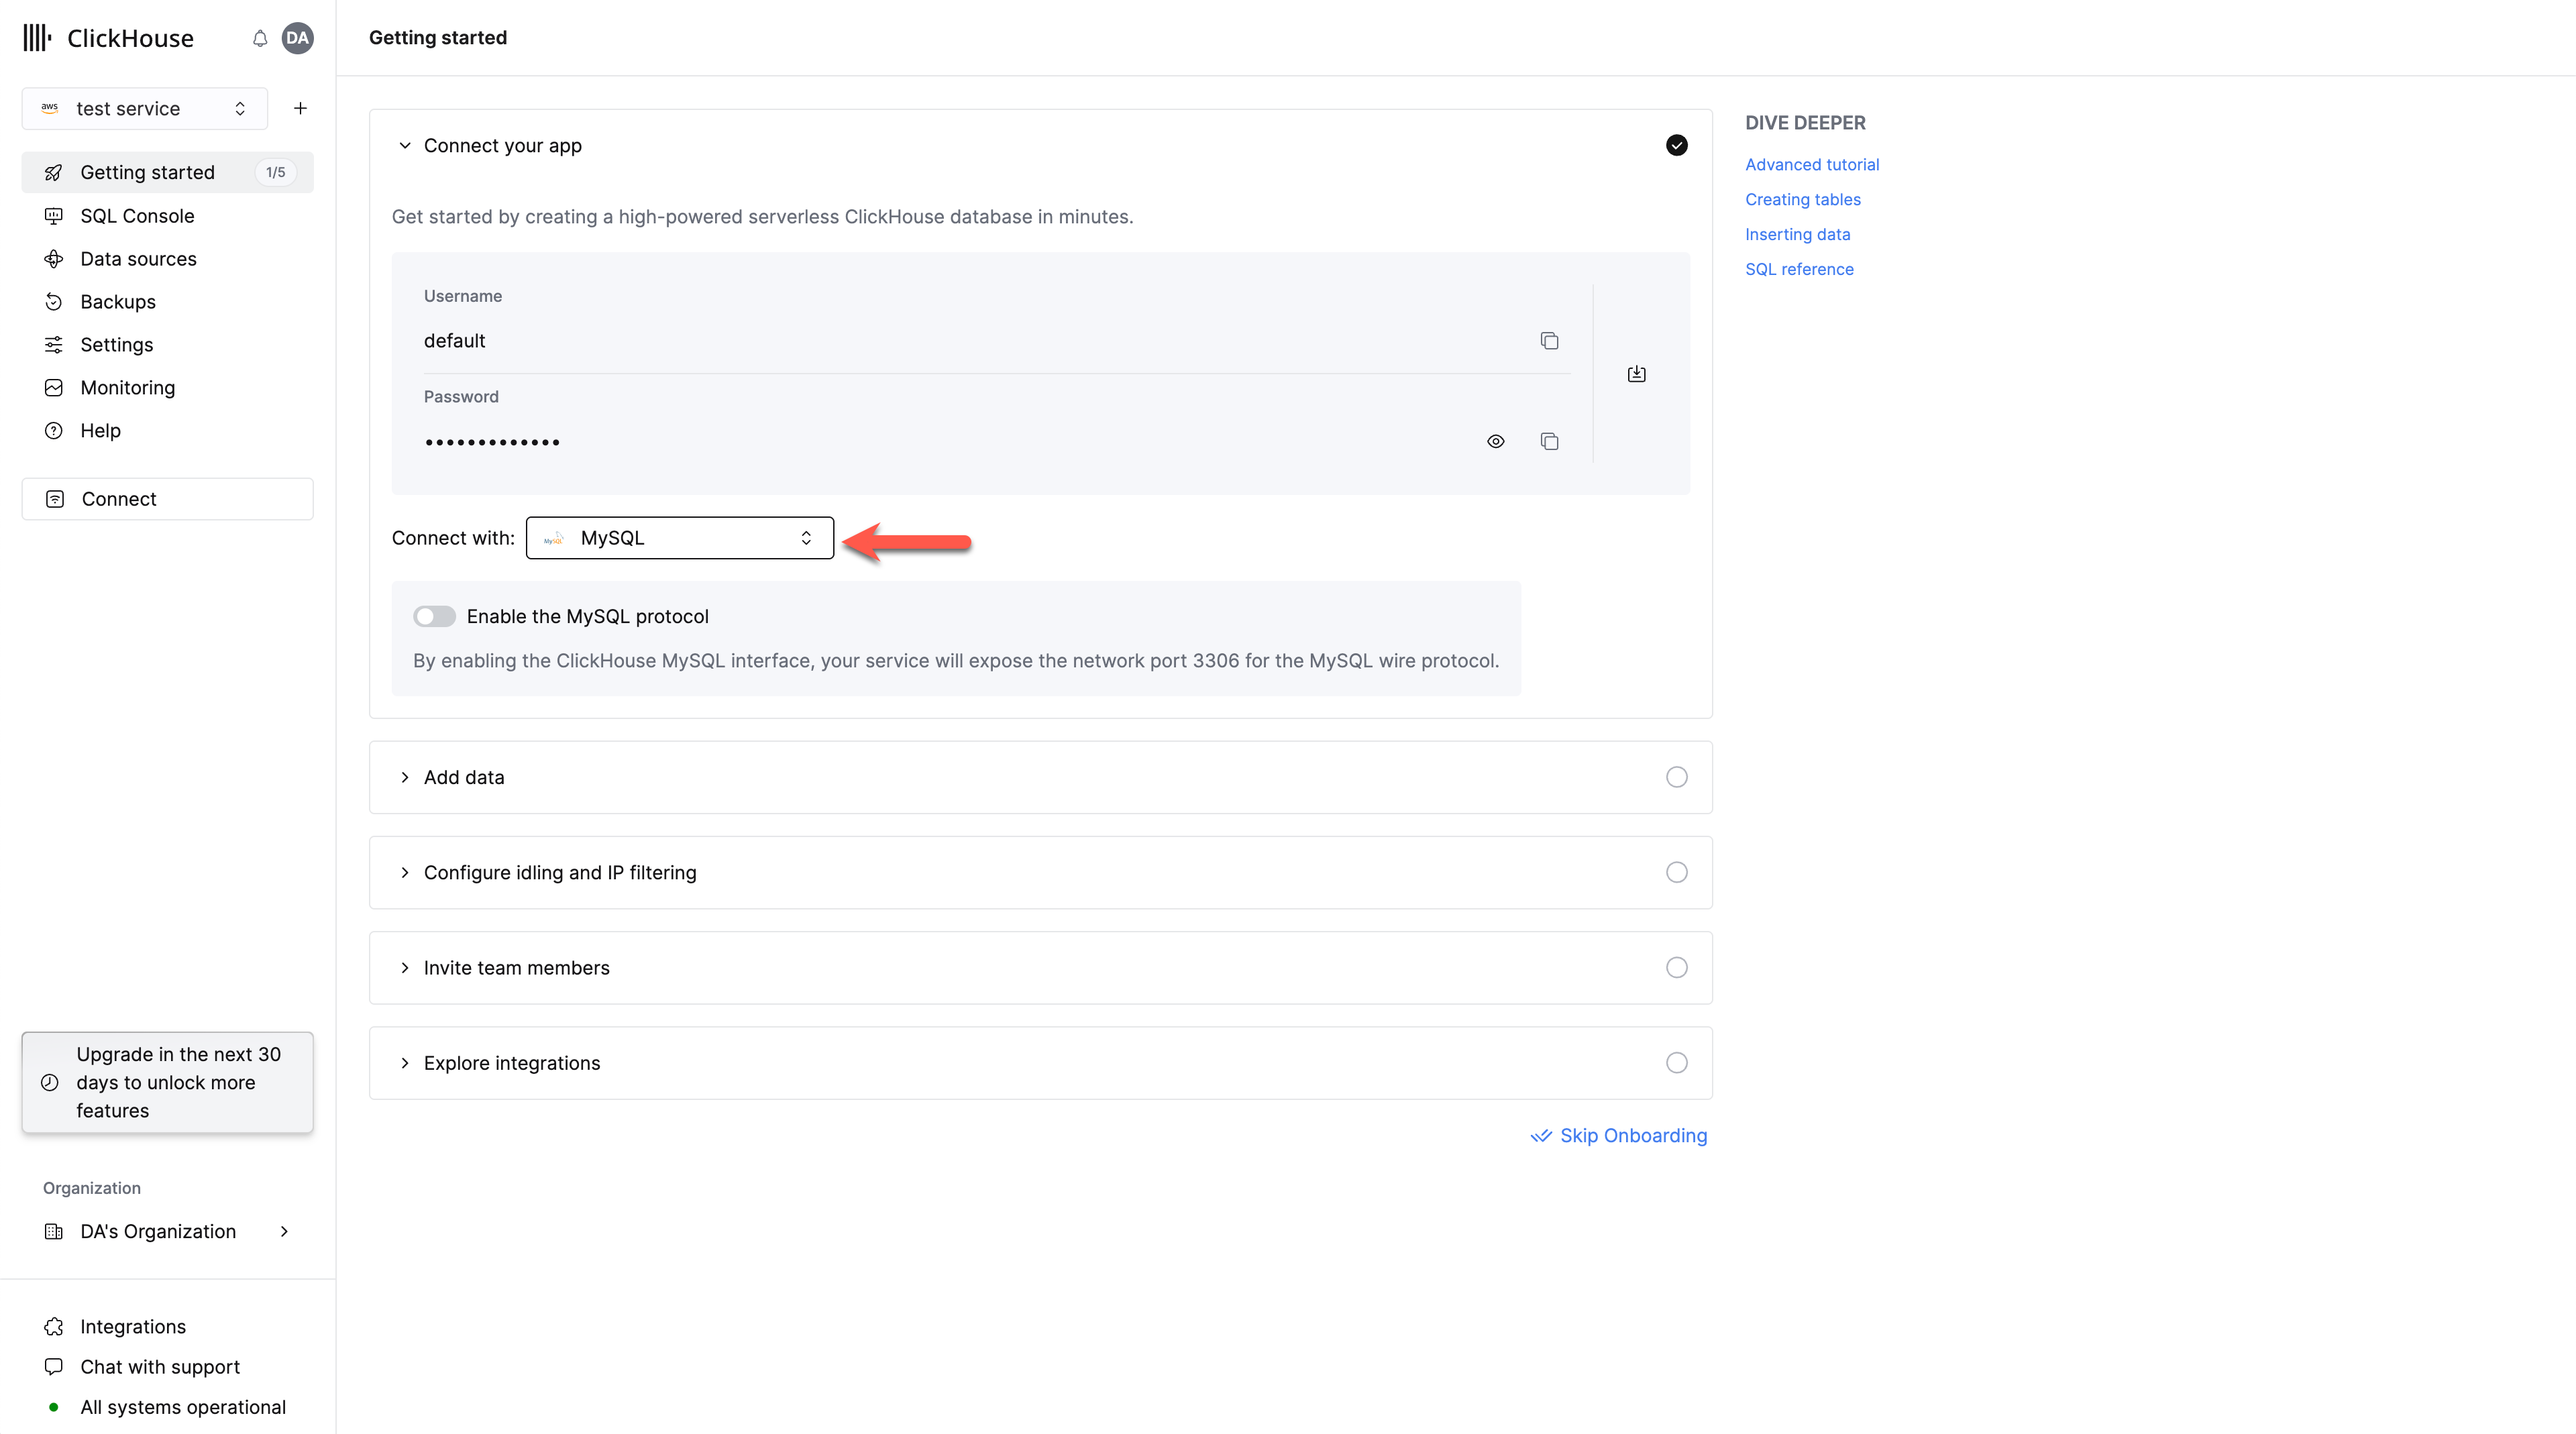
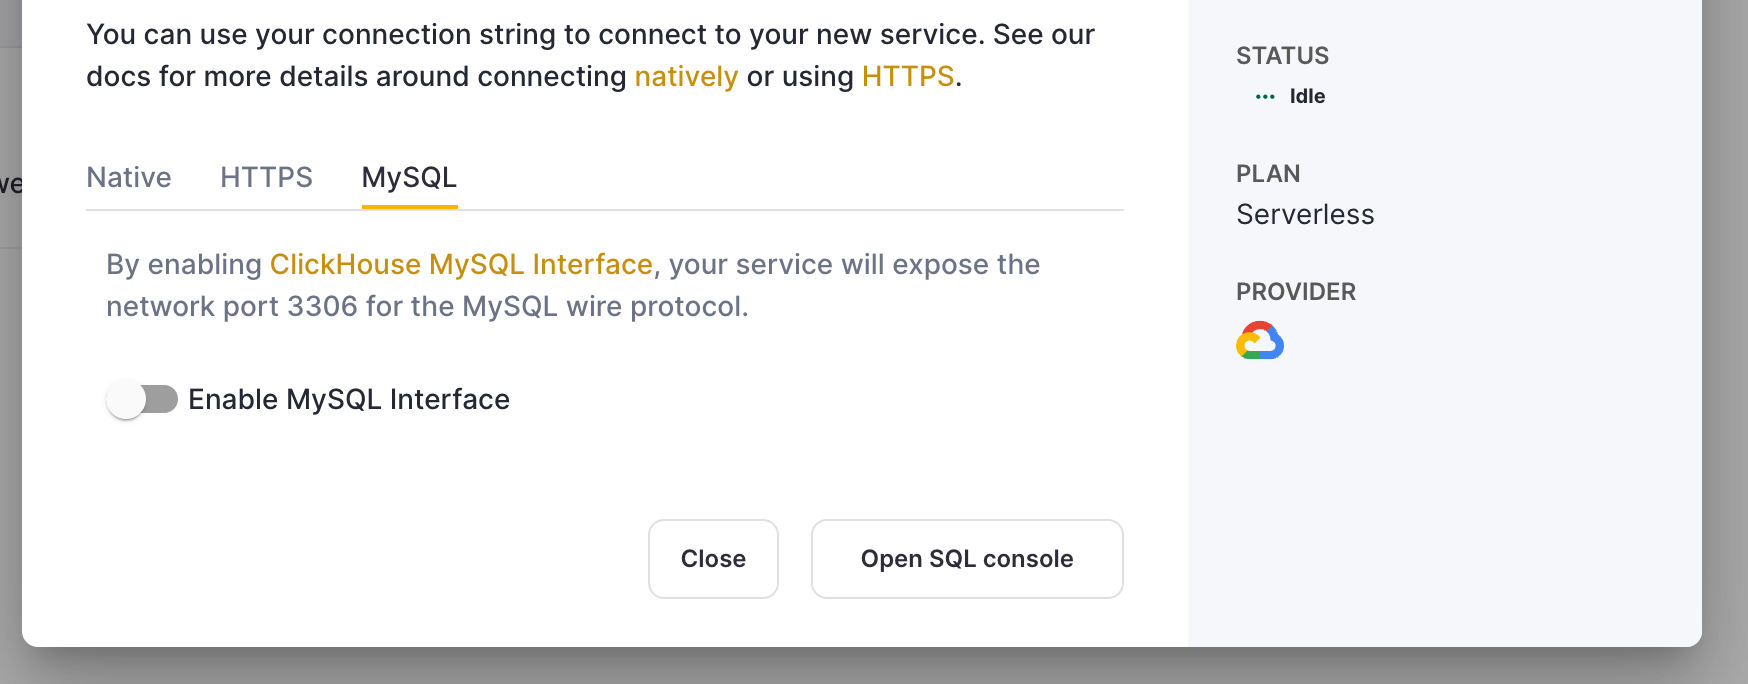
Enable the MySQL interface
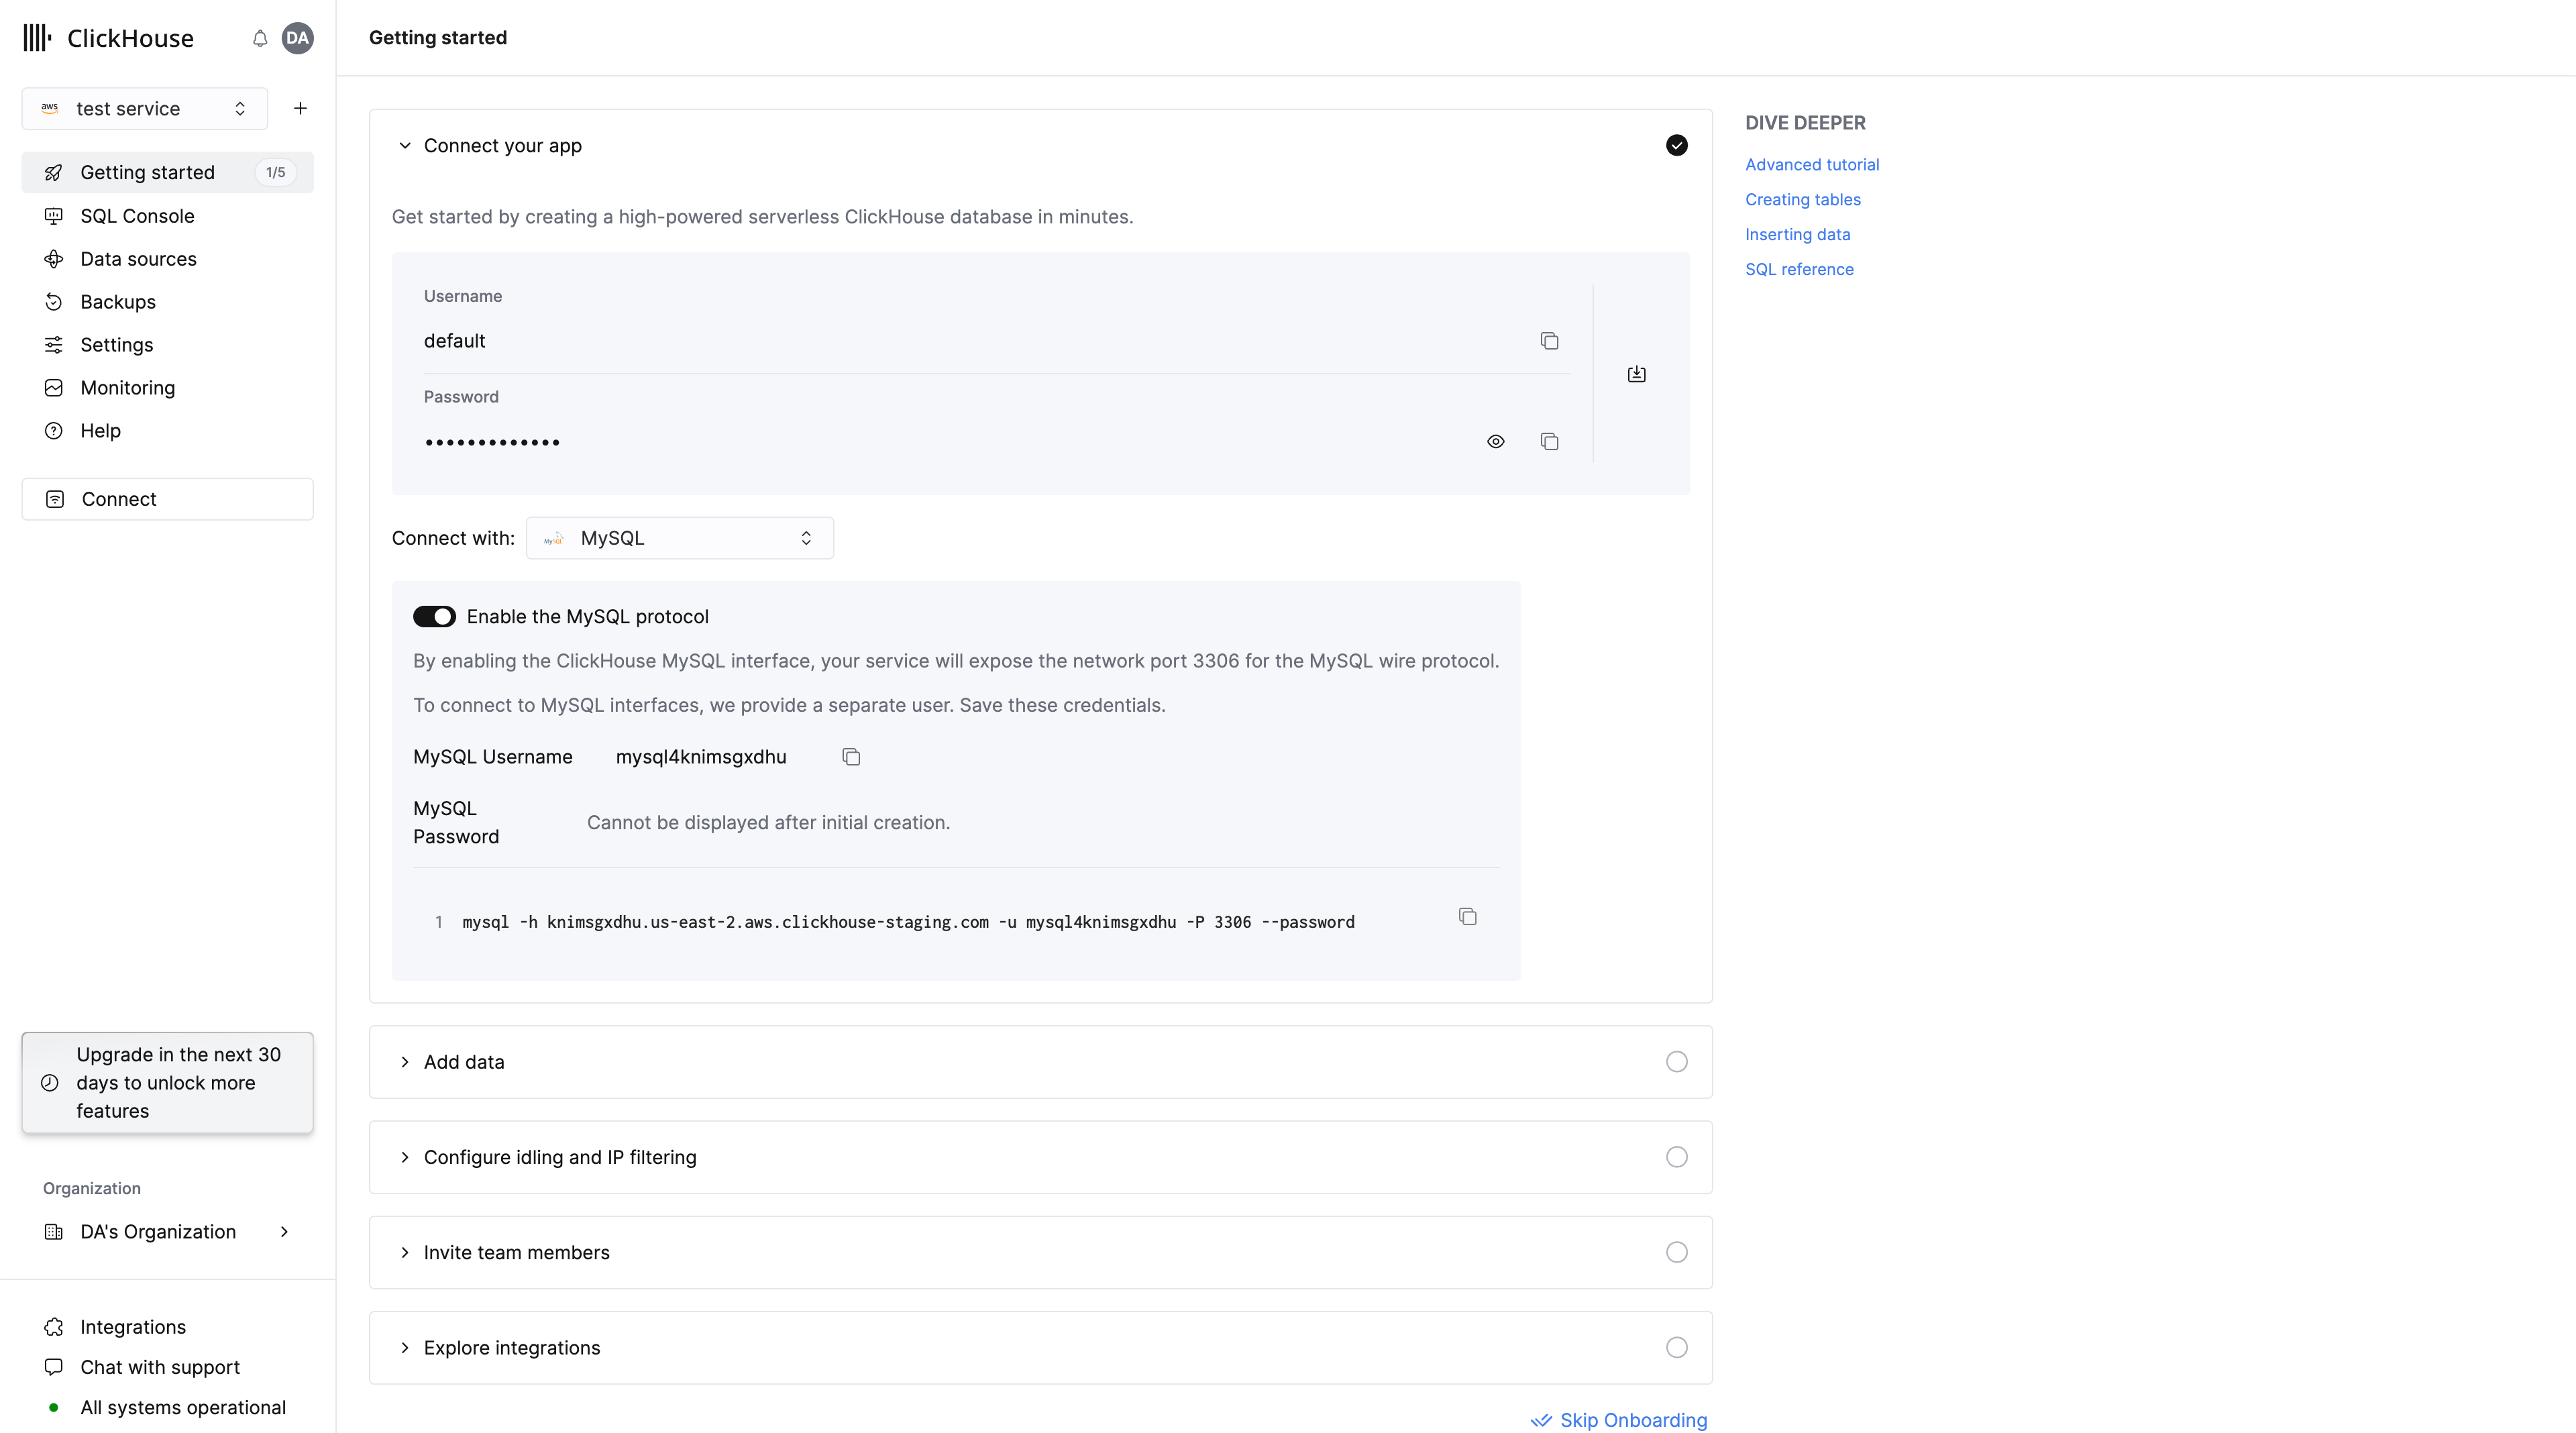
Toggle the switch to enable the MySQL interface for this specific service.
This will expose port 3306 for this service and prompt you with a MySQL connection screen that includes your unique MySQL username.
Alternatively, in order to enable the MySQL interface for an existing service:
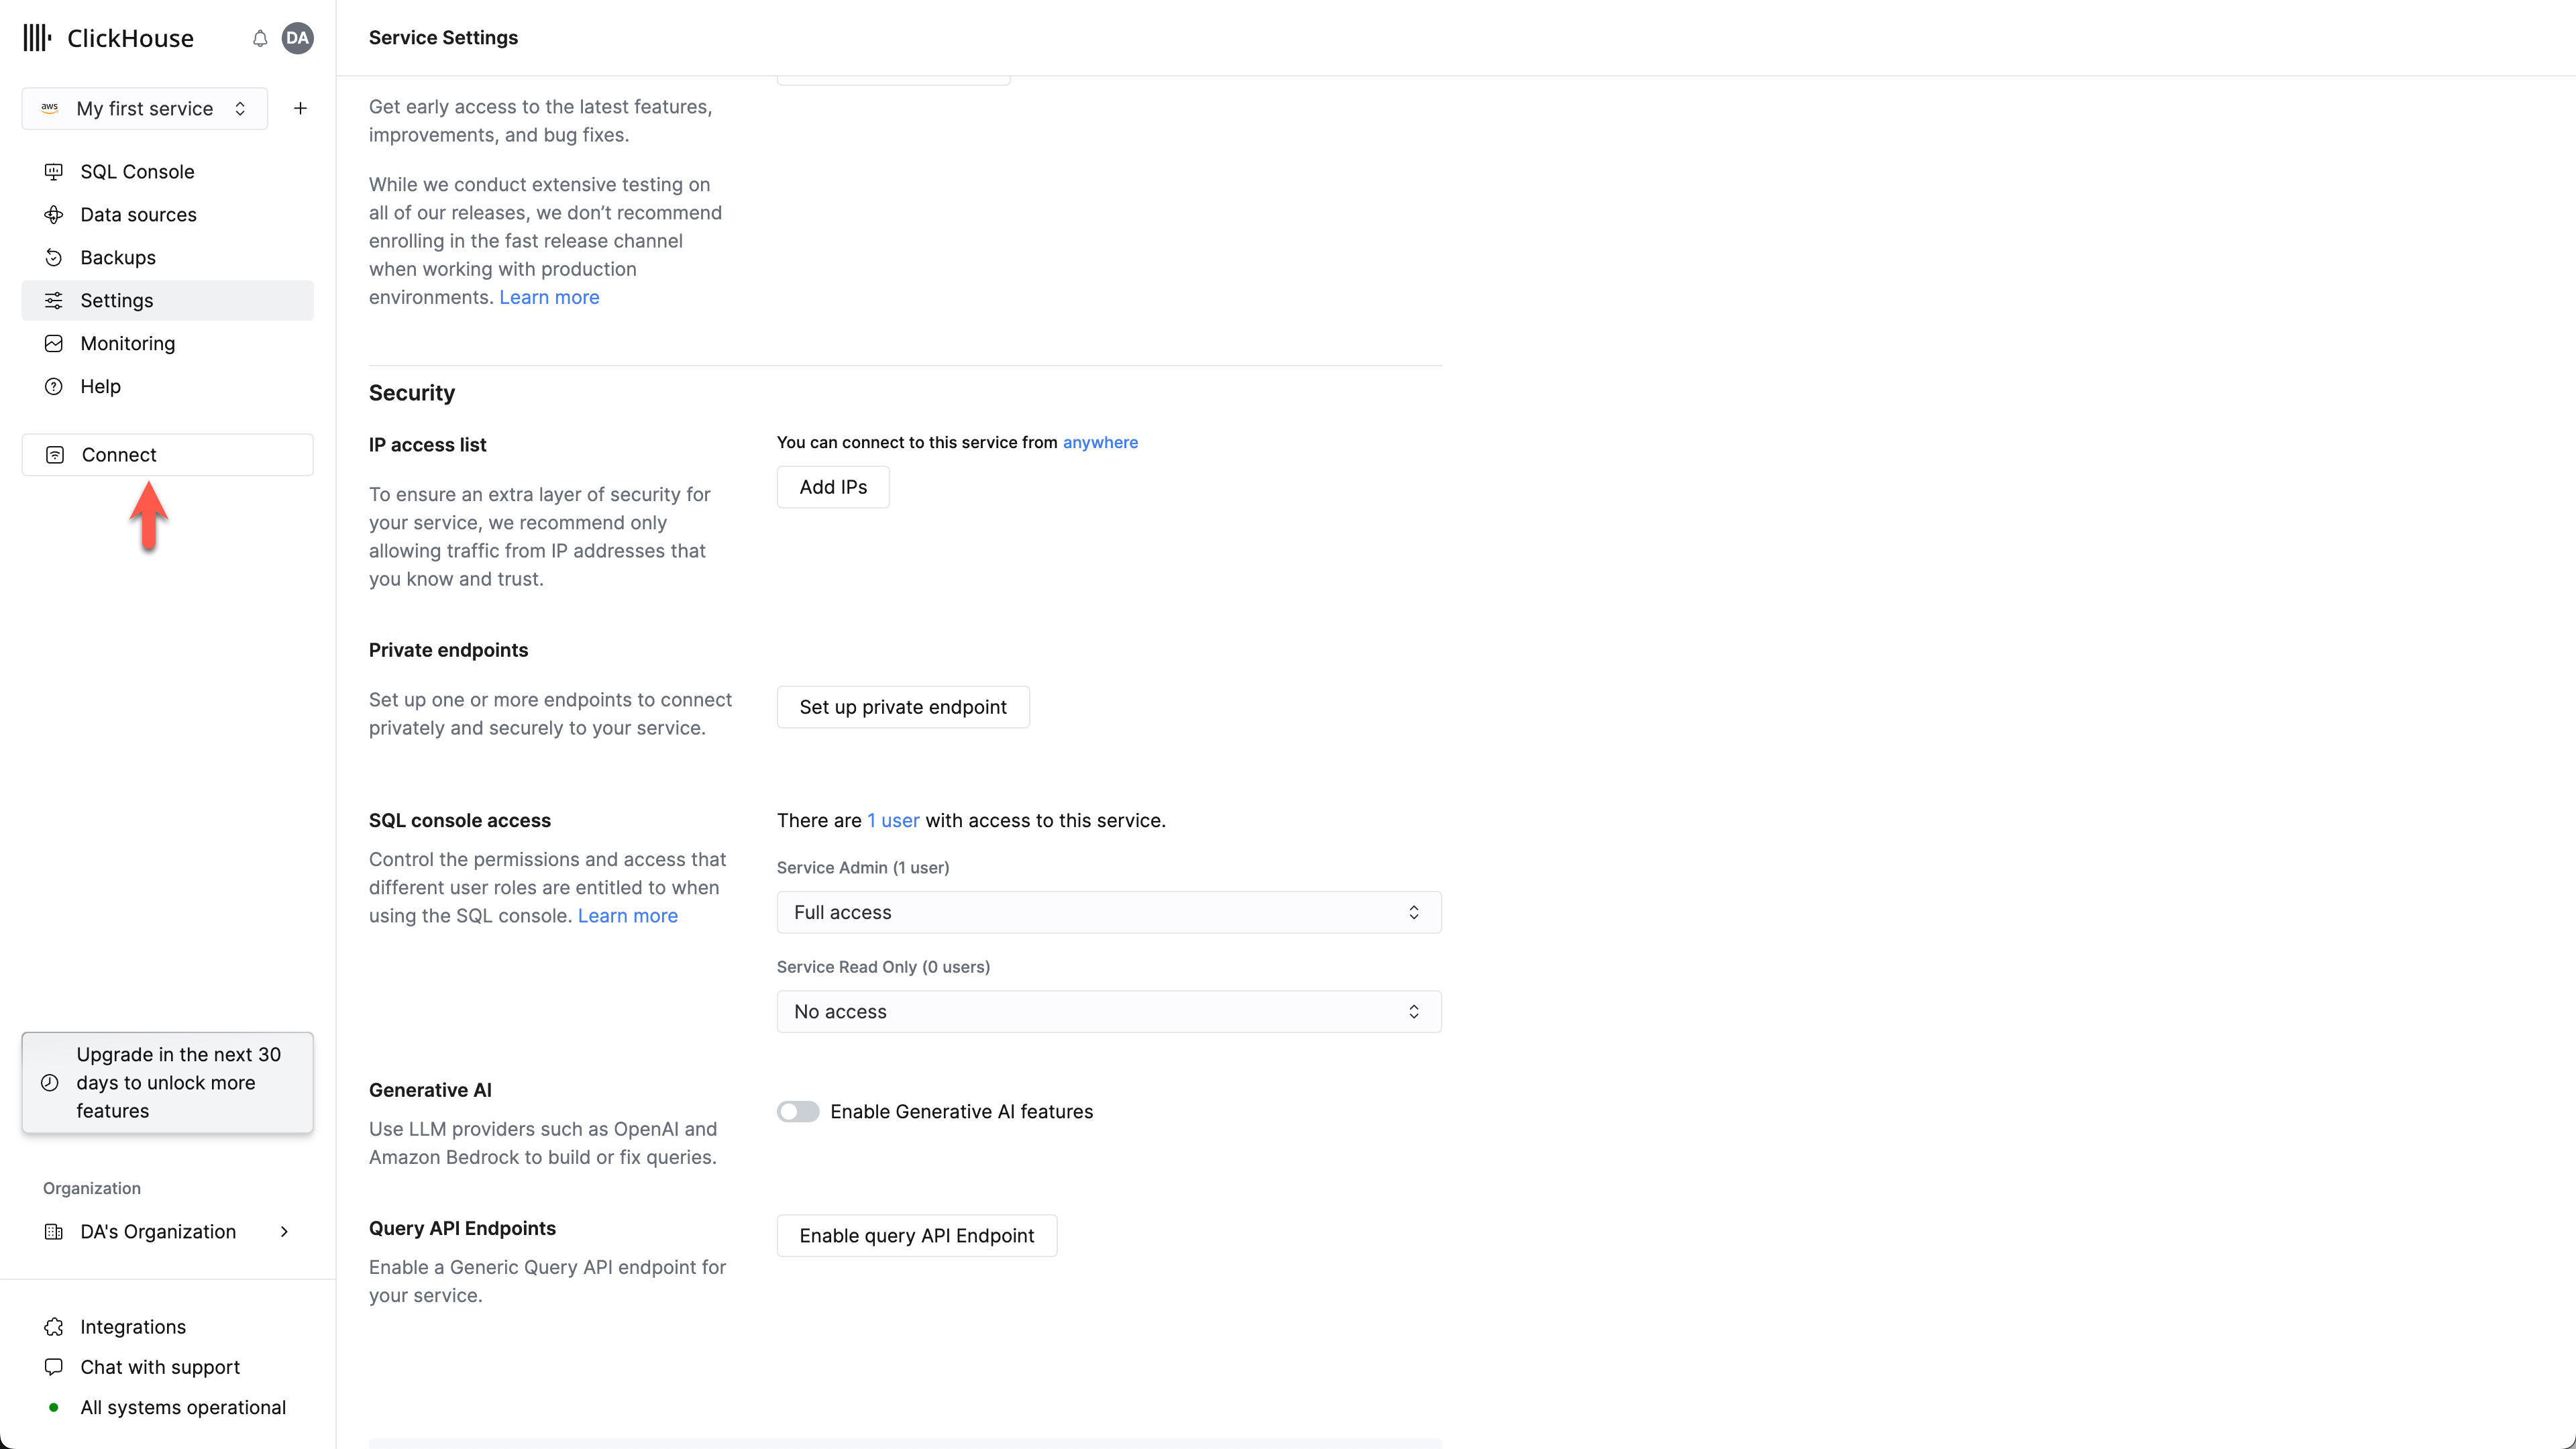
Select Connect
Ensure your service is in Running state then click on the service you want to enable the MySQL interface for.
Select "Connect" from the left menu:
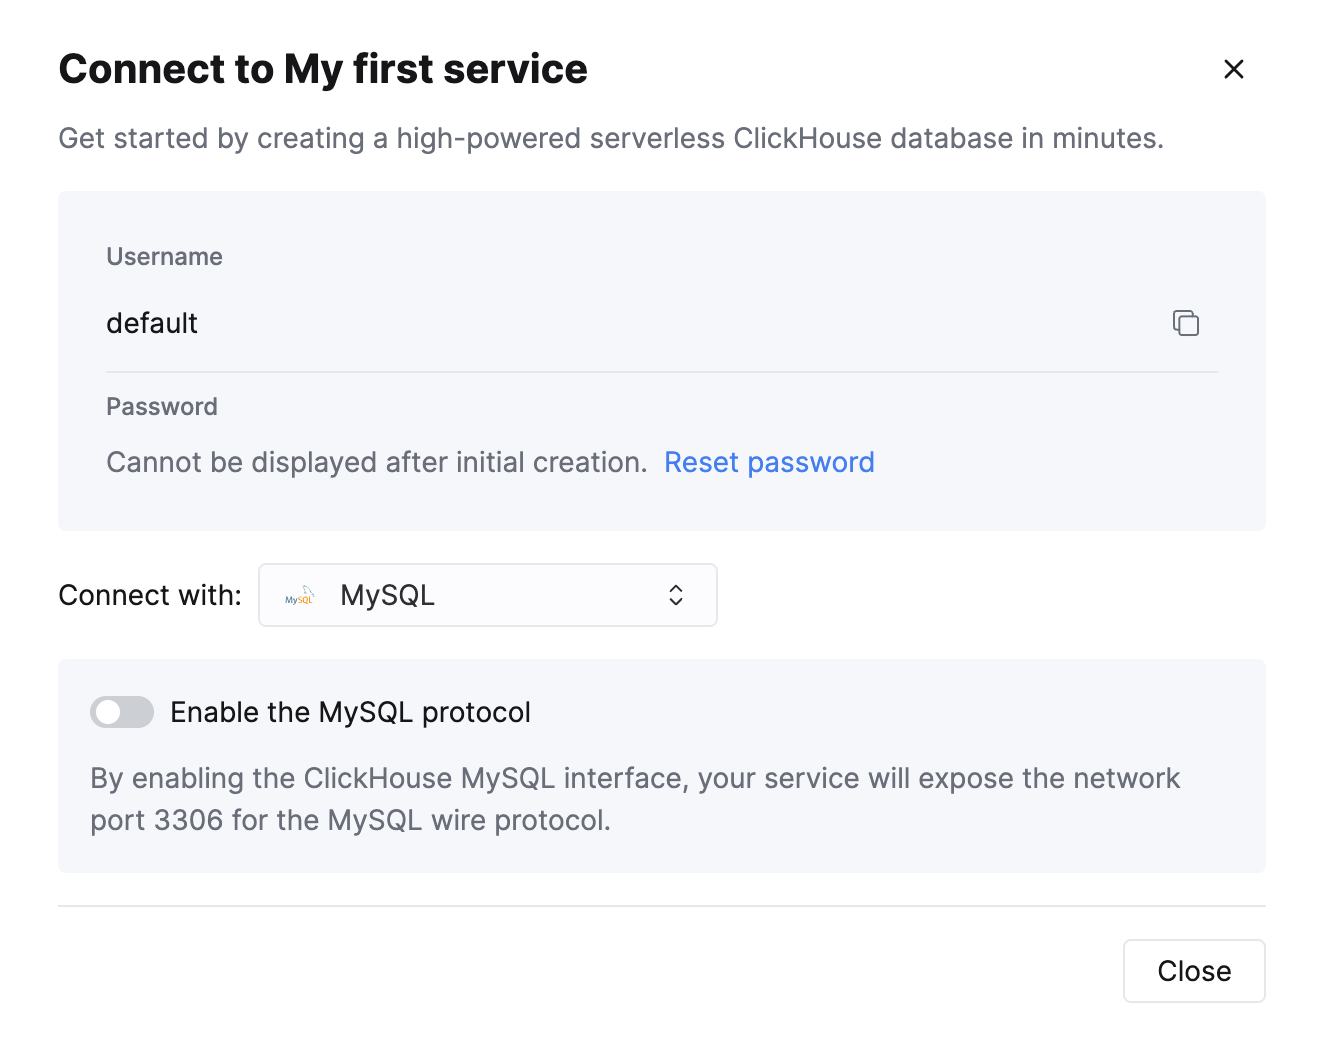
Enable the MySQL interface
Toggle the switch to enable the MySQL interface for this specific service.
This will expose port 3306 for this service and prompt you with your MySQL connection screen that include your unique MySQL username.
Creating a readonly MySQL user in ClickHouse Cloud
ClickHouse Cloud automatically creates a mysql4<subdomain> user that shares the same password as the default user.
The <subdomain> portion corresponds to the first part of your ClickHouse Cloud hostname.
This username format is required for compatibility with tools that establish secure connections but don't include SNI (Server Name Indication) data in their TLS handshake. Without SNI information, the system cannot perform proper internal routing, so the subdomain hint embedded in the username provides the necessary routing information. The MySQL console client is an example of a tool that requires this.
A recommended best practice is to create a new readonly MySQL user.
For a ClickHouse Cloud hostname like foobar.us-east1.aws.clickhouse.cloud, the <subdomain> part equals to foobar, and a custom MySQL username could look like mysql4foobar_team1.
Create a readonly settings profile
Create a settings profile to apply to your readonly user,
setting the readonly setting to 1:
Create a new readonly MySQL user
Create a user with a name following this format:
Apply the readonly_profile to the new user and make sure that the password is in double SHA1 format. For example:
Grant the new user permissions to access the desired tables
Grant the new user the necessary permissions to interact with the desired tables or databases.
For example, if you want to grant access to system.query_log only:
For the readonly user, make sure to only grant SELECT permissions to the tables you want to access.
The newly created user can be used to connect to your ClickHouse Cloud service with the MySQL interface.
Troubleshooting multiple MySQL users in ClickHouse Cloud
If you created a new MySQL user, and you see the following error while connecting via MySQL CLI client:
In this case, ensure that the username follows the mysql4<subdomain>_<username> format, as described (above).
Настройка локального сервера ClickHouse
Please refer to the official documentation on how to set up a ClickHouse server with enabled MySQL interface.
Aside from adding an entry to the server's config.xml
it is also required to use Double SHA1 password encryption for the user that will be using MySQL interface.
Generating a random password encrypted with Double SHA1 from the shell:
The output should look like the following:
The first line is the generated password, and the second line is the hash we could use to configure ClickHouse.
Here is an example configuration for mysql_user that uses the generated hash:
/etc/clickhouse-server/users.d/mysql_user.xml
Replace password_double_sha1_hex entry with your own generated Double SHA1 hash.
Additionally, it is recommended to use use_mysql_types_in_show_columns
to show the native MySQL types instead of ClickHouse ones in SHOW [FULL] COLUMNS query results,
which allows BI tools to properly introspect the database schema when using MySQL connectors.
For example:
/etc/clickhouse-server/users.d/mysql_user.xml
or assign it to a different profile instead of the default one.
If you have the mysql binary available, you can test the connection from the commandline.
Using the sample username (mysql_user) and password (LZOQYnqQN4L/T6L0) from above the command line would be:
Finally, configure the Clickhouse Server to listen on the desired IP address(es). For example, in config.xml, uncomment out the following to listen on all addresses:
Подключение Looker Studio к ClickHouse
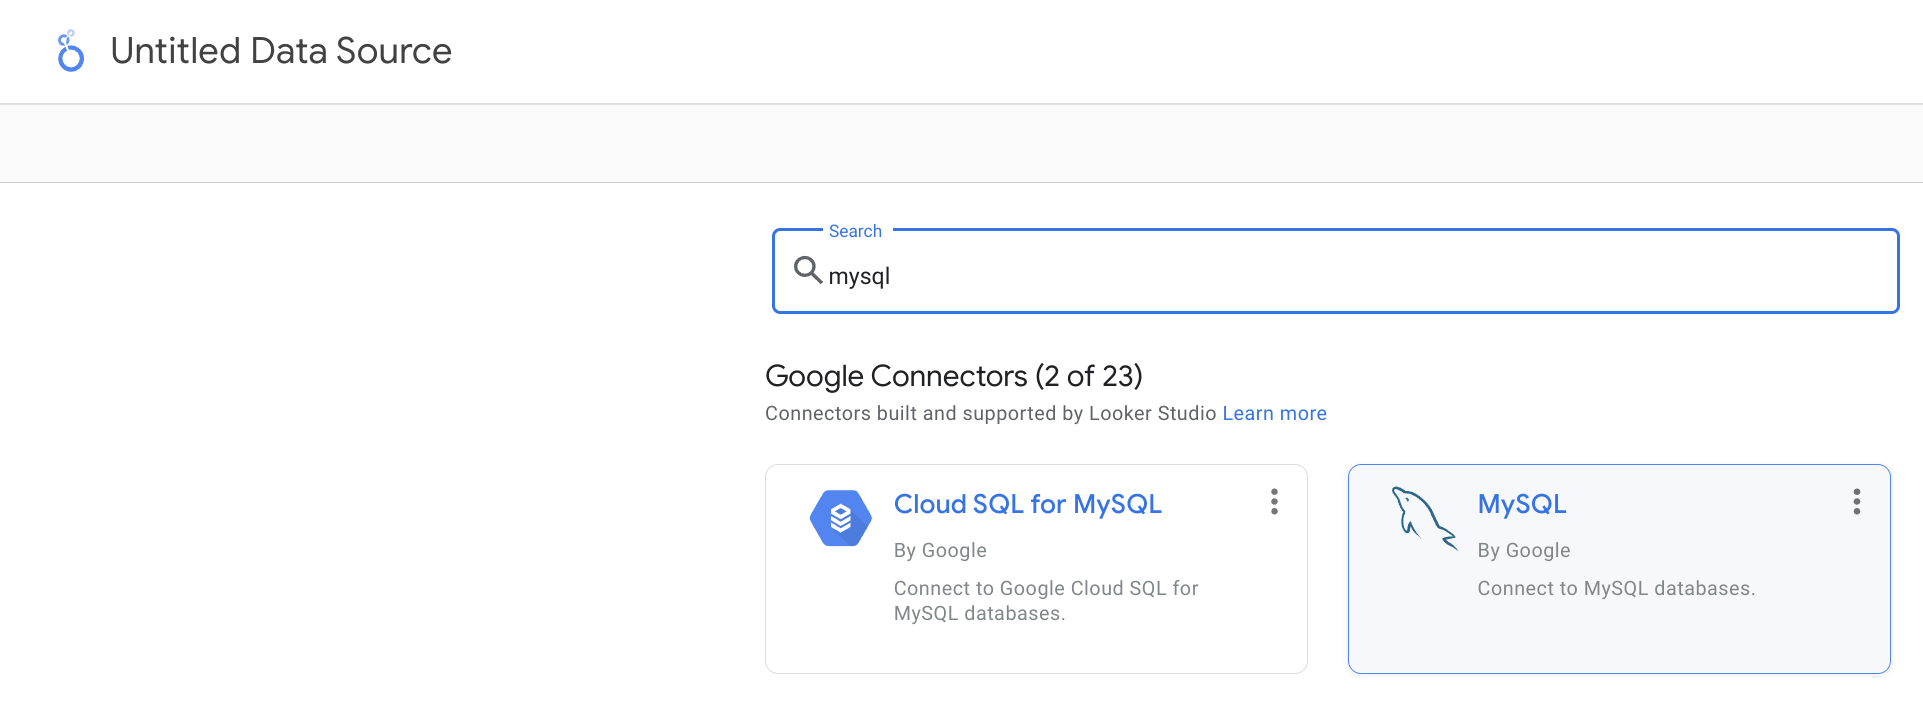
Сначала войдите на сайт https://lookerstudio.google.com под своей учетной записью Google и создайте новый источник данных (Data Source):

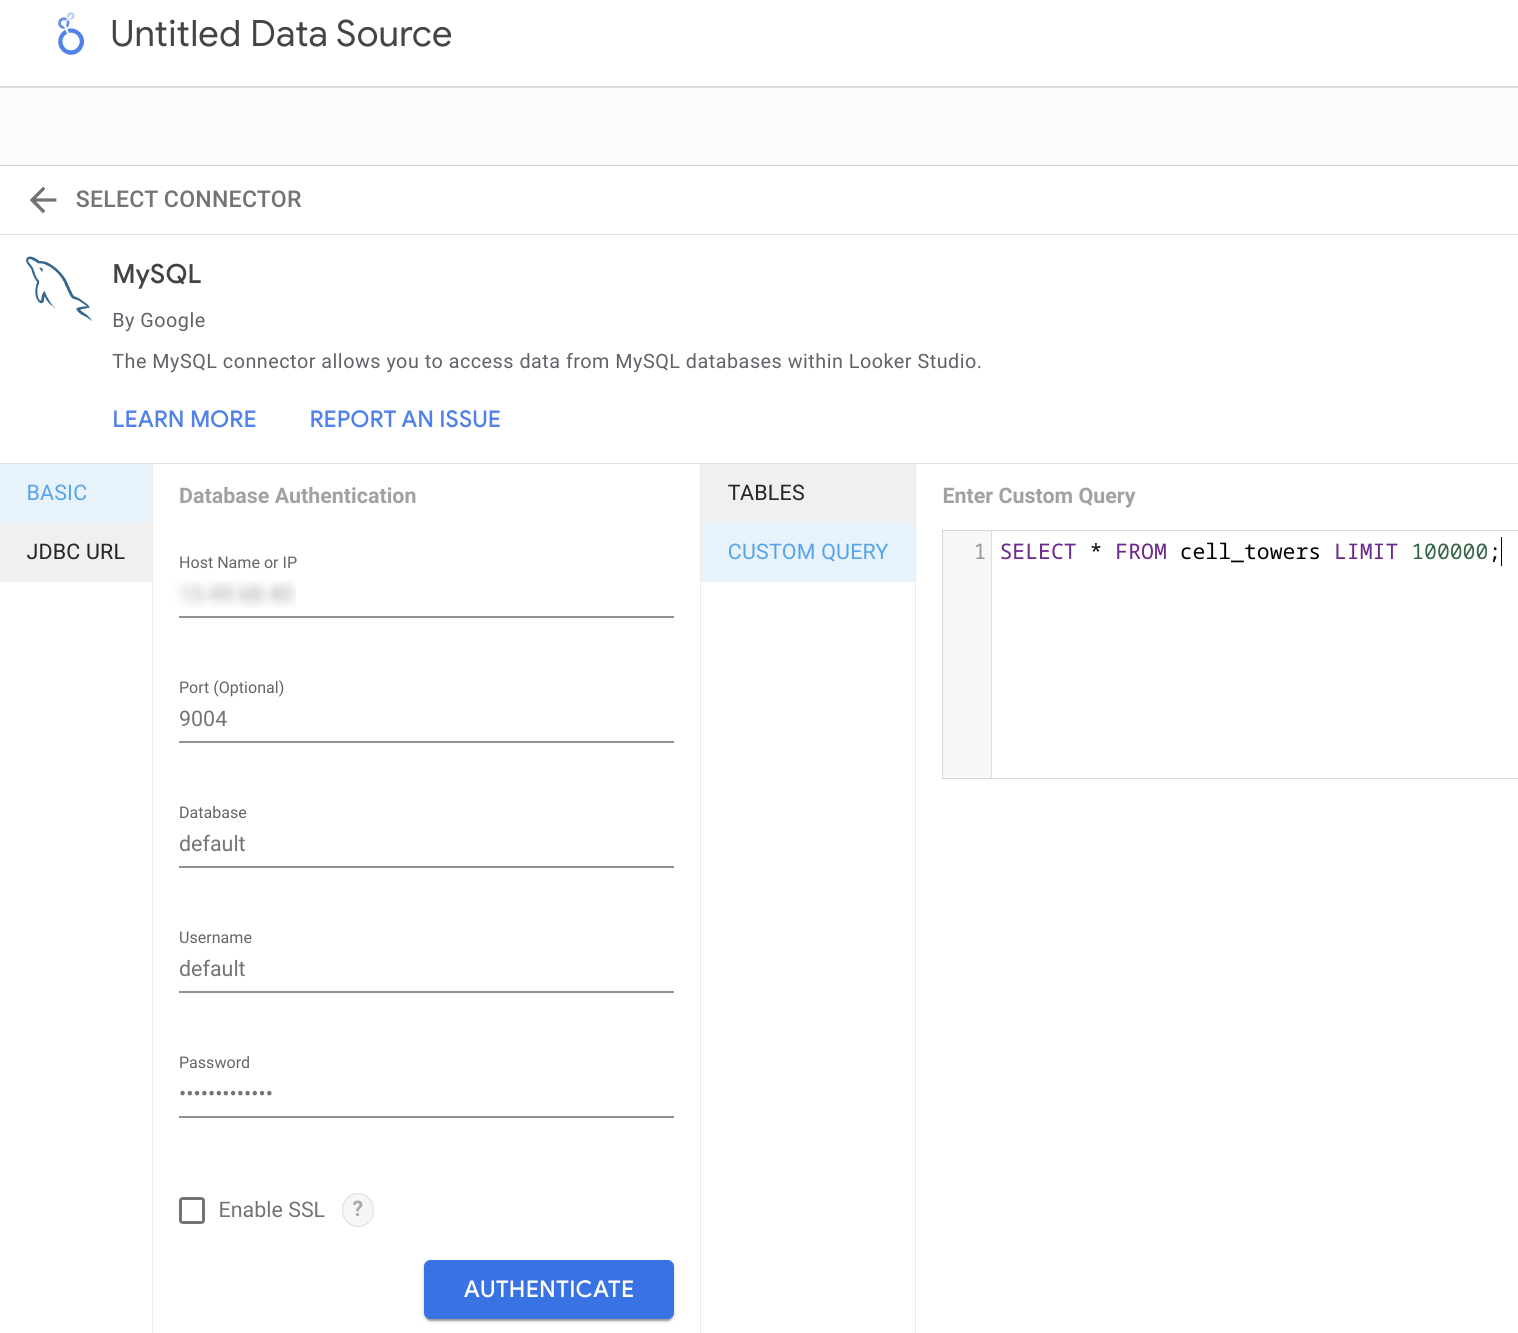
Найдите официальный коннектор MySQL от Google (называется просто MySQL):
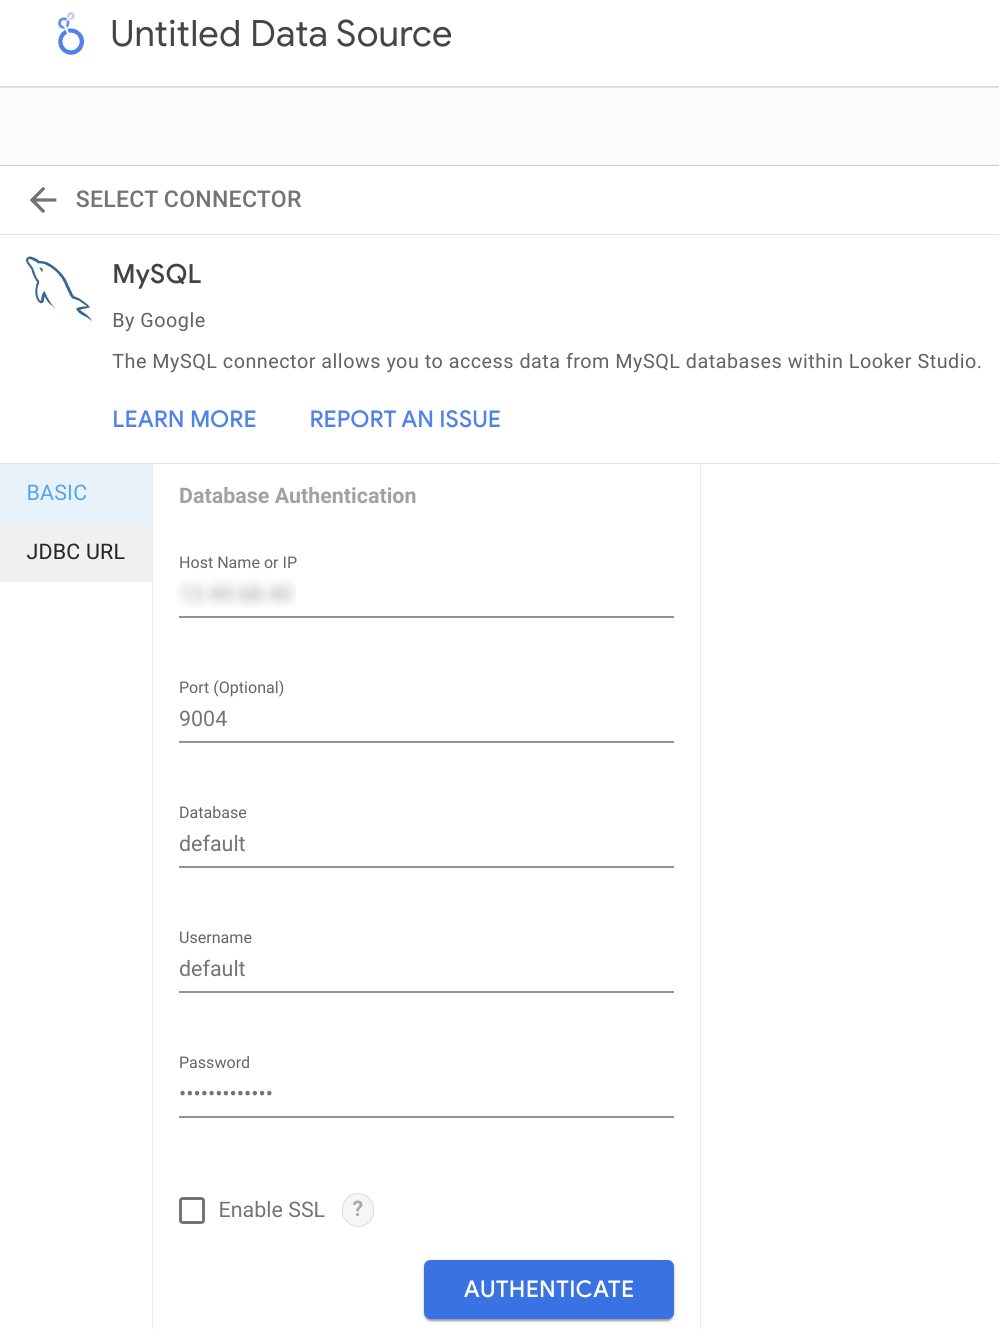
Укажите параметры подключения. Обратите внимание, что порт интерфейса MySQL по умолчанию — 9004, и он может отличаться в зависимости от конфигурации вашего сервера.
Теперь у вас есть два варианта получения данных из ClickHouse. Можно использовать инструмент Table Browser:
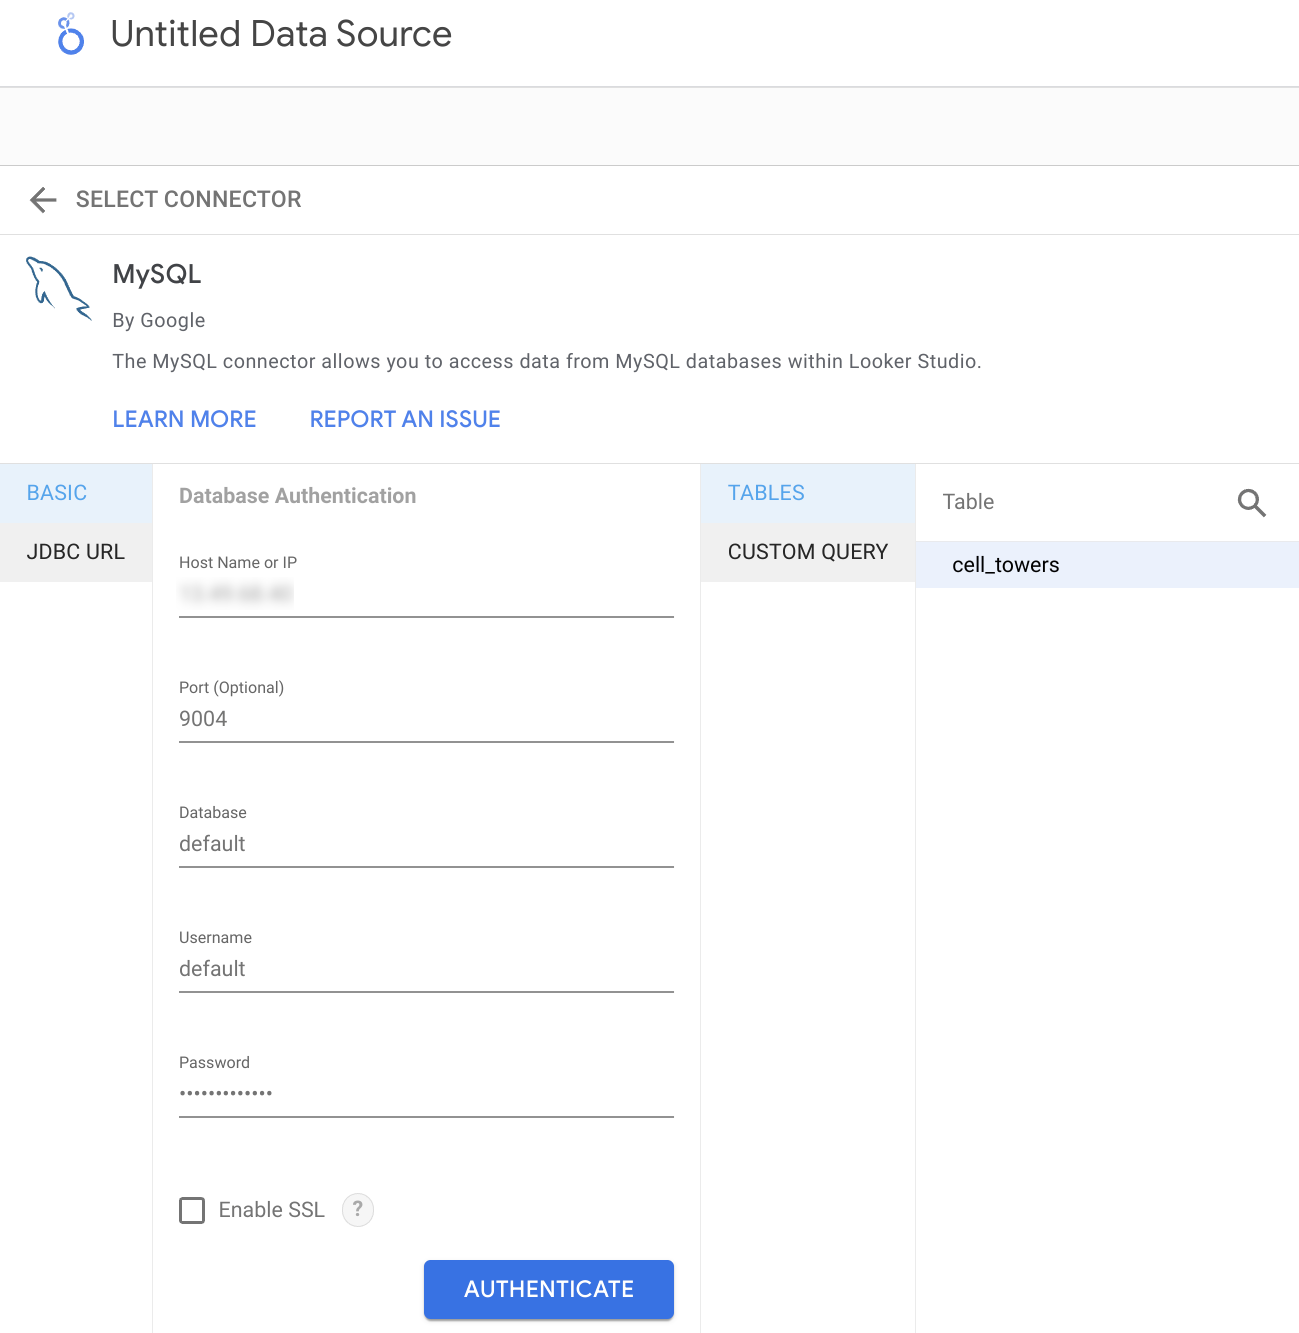
Либо вы можете указать произвольный SQL-запрос для получения данных:
В результате вы увидите автоматически определенную структуру таблицы и при необходимости сможете скорректировать типы данных.
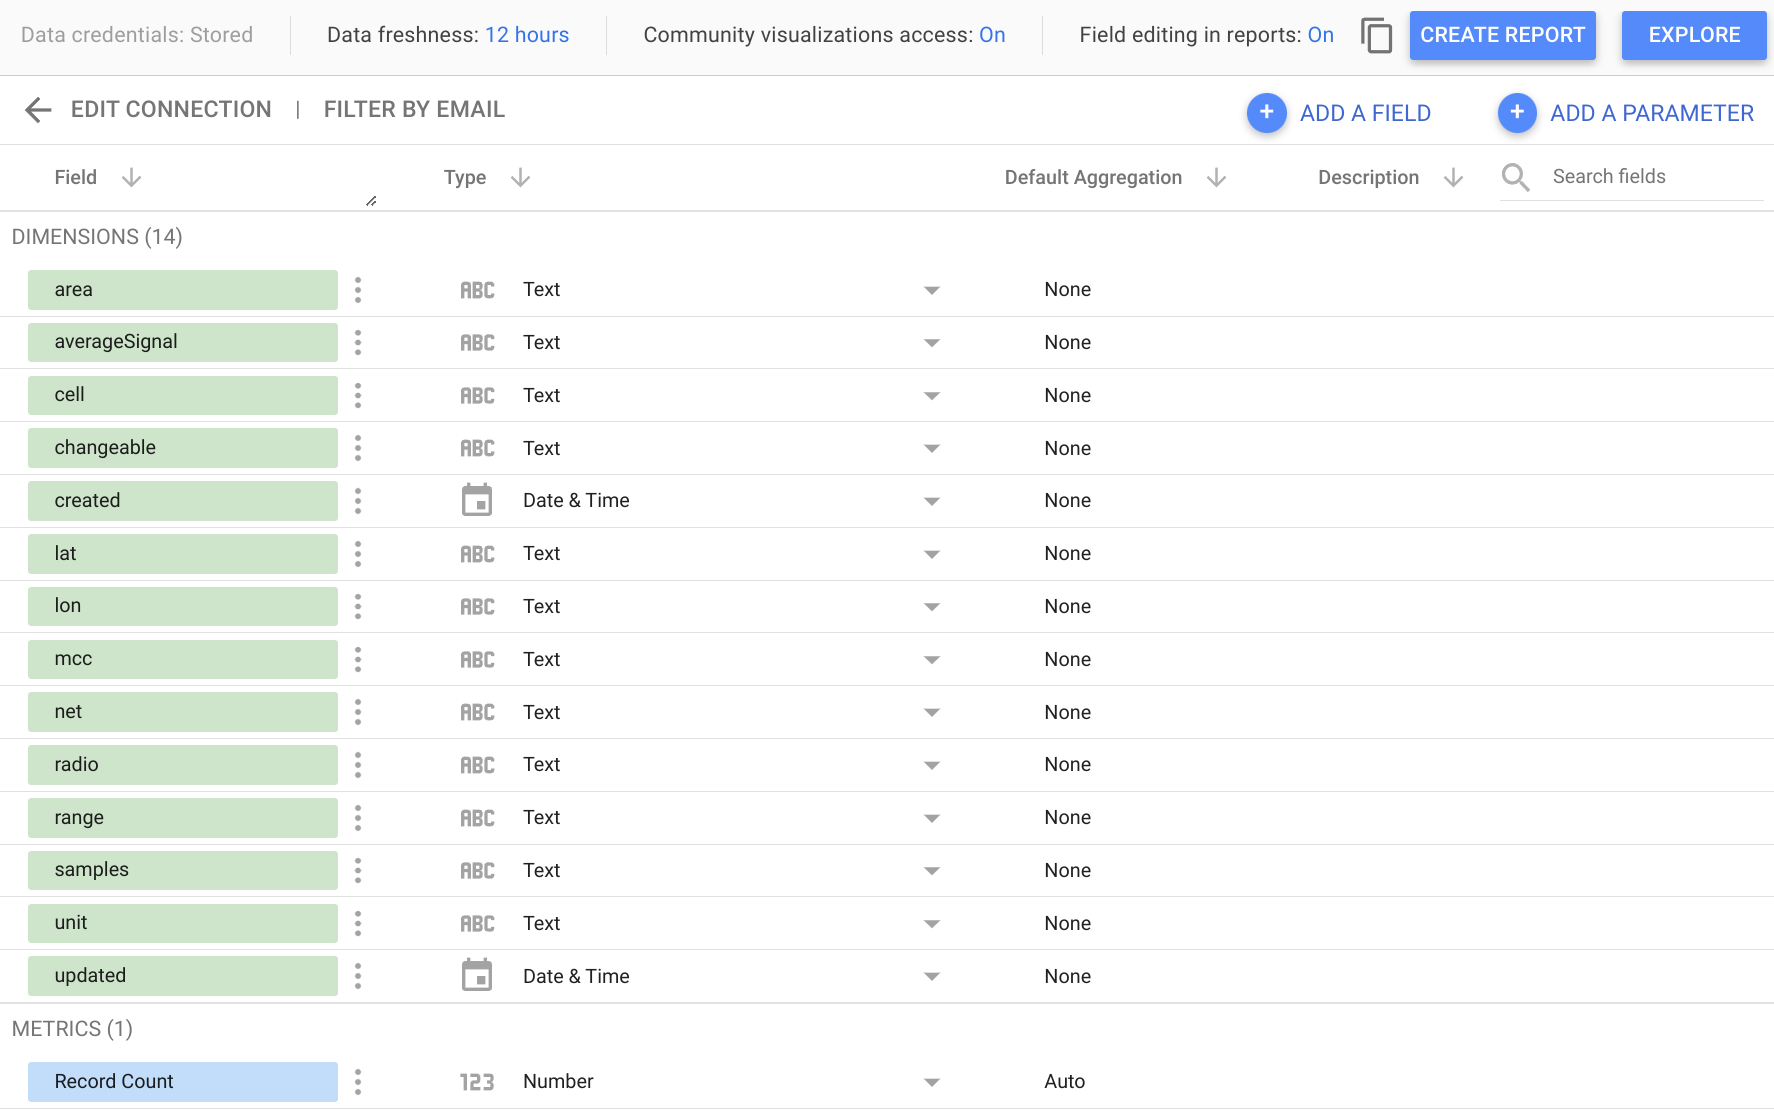
Теперь вы можете приступать к анализу своих данных или созданию нового отчета!
Использование Looker Studio с ClickHouse Cloud
При использовании ClickHouse Cloud сначала необходимо включить интерфейс MySQL. Это можно сделать в диалоговом окне подключения, на вкладке «MySQL».
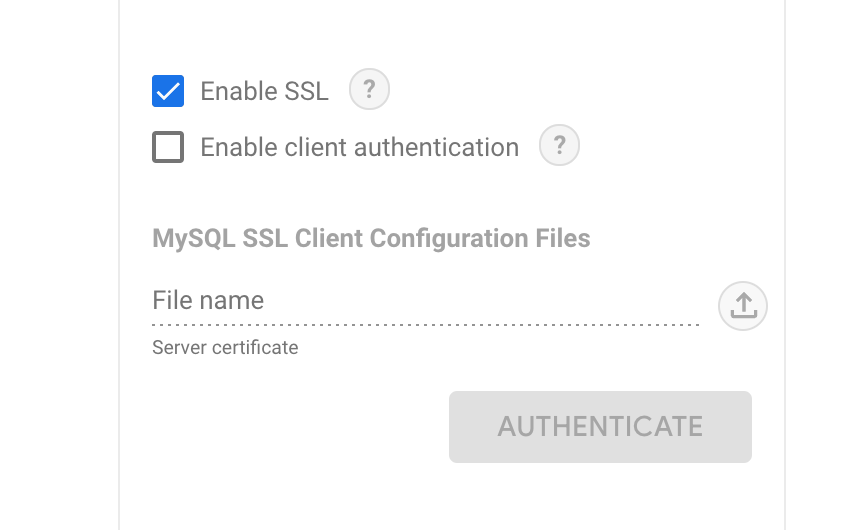
В интерфейсе Looker Studio выберите опцию «Enable SSL». SSL-сертификат ClickHouse Cloud подписан центром Let's Encrypt. Вы можете скачать корневой сертификат здесь.
Остальные шаги такие же, как описано выше в предыдущем разделе.
